Scrolling Logos in Squarespace using a Gallery Section
An update to my previous Scrolling Logo in Squarespace Tutorial. This tutorial walks you through creating your own Auto Scrolling Logo Slider on your website. We’ll be using a Squarespace 7.1 gallery section to get this done.
Looking for AN old version of this code?
See the reference at the bottom of this article for a link back to the old version.

Usage
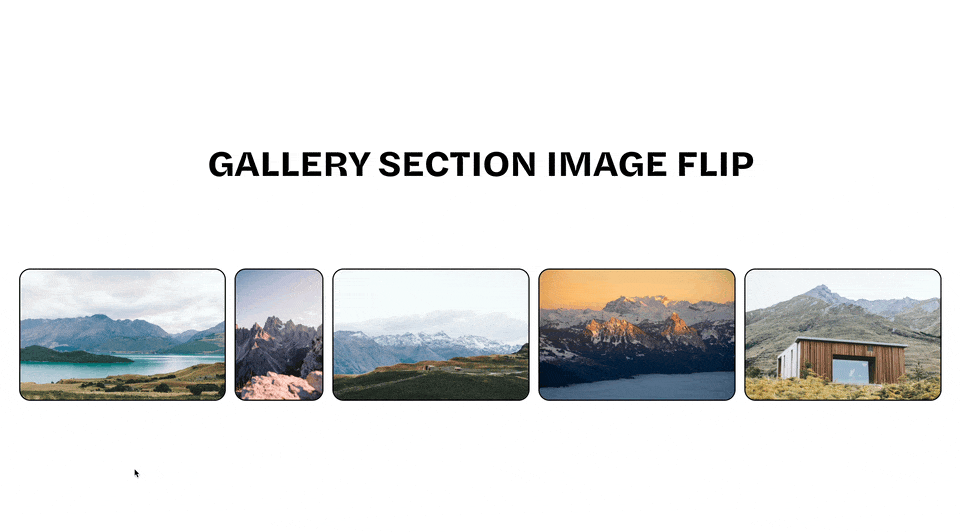
Add a new gallery section on your page where you want the logo slider. Add the logos that you want in the slider. Be sure to upload PNG images if you want them to have transparent backgrounds.
Paste both the Javascript & CSS below into the settings » advanced » page header code injection area of that one page.
The defaults of this code will take the first gallery section on your page, and start auto-scrolling them every 3 seconds.
Customize
The javascript code below has 3 variables you can adjust.
gallery - set this to whichever gallery section on the page you want to autoscroll. 1 will grab the first gallery section on the page, 2 will grab the section gallery section on the page,etc.
direction - sets the direction the gallery section will move. 1 will be backwards, 2 will be forwards.
timing - this is the delay between scrolls of the gallery items, in milliseconds. 3000 means 3 seconds.
Adjust the height property values in the CSS to play with height on mobile & desktop.
<script>
    /**
    *  Gallery Section Auto Scroller
    **/
  (function () {
    setAutoScroll({
      gallery: 1,
      direction: 2,
      timing: 3000,
    });

    /*
    * Copy and paste the above code
    * to target more auto-scrolling
    * sections
    **/

    /** gallery
    * gallery section order on the page. Ex:
    * 1 = the first gallery section on a page,
    * 2 = the second gallery section on a page
    **/

    /** direction
    * direction the gallery should go in.
    * 1 = backwards,
    * 2 = forwards
    **/

    /** timing
    * timing between each slide, in milliseconds. Ex:
    * 2000 = 2 seconds
    **/

    function setAutoScroll(settings) {
      function init() {
        let section = document.querySelectorAll(".page-section.gallery-section")[settings.gallery - 1];

        function clickArrow() {
          if (section && !document.querySelector("html.sqs-modal-lightbox-open") && !document.hidden && !document.querySelector("body.sqs-edit-mode")  && !document.querySelector("body.header--menu-open")  && !document.querySelector("body.wm-mega-menu--open")) {
            let arrow = section.querySelectorAll(".gallery-reel-control .gallery-reel-control-btn")[settings.direction - 1];
            if (arrow) arrow.click();
          }
        }

        window.setInterval(clickArrow, settings.timing);
      }

      window.addEventListener("DOMContentLoaded", init);
    }
  })();


</script>
<style>
.gallery-reel {
  height: clamp(75px, 25vw, 200px) !important;
  padding: 17px 0px !important;
}
</style>
References
Looking for my previous tutorial on this? See here.
Related Code Snippets
The below Code Snippets are available to Code Curious members.